Showing posts with label simple. Show all posts

Wednesday, 14 January 2015

VEGAN SUSHI ROLLS (without a bamboo mat)

VEGAN SUSHI ROLLS
Sushi is such an easy thing to make vegan.  Its great for having people over because you can make tons for so cheap. Its easy to make lots of different kinds and just an all around awesome meal. It takes a bit of practice to get the rolling part right but there's tools you can use to make it easier! Personally I just always use my hands but my little sister uses this. Its a sushi bamboo rolling mat. Theres a link attached if you want to buy one check them out. As well as a picture below. It works awesome and makes your rolls really perfect. Plus you can make rolls with rice on the outside and seaweed in the middle which is pretty hard to do when you don't have one. There's so many great ingredients you can use in a sushi roll. Heres a list; cucumber, carrot, celery, avocado, tofu, yam tempura,  ginger,  garlic, seitan piece's, bell peppers, onion, spinach, lettuce, thats the most I can think of but I bet theres more! I love all of the San J gluten free sauces. The soy sauce they make is perfect. I also love using everland sweet and sour sauce!! Its by far my favourite organic sweet and sour sauce ever! Theres a link to both companies websites attached to their names if you want to check them out. Heres my quick easy steps for making sushi.


Rinse your sushi rice in a strainer until the water runs clear. About 1 to 2 minutes. In a medium sized pot combine your water and rice. The measurements are a little different for sushi rice. It should be about 1 cup to 1 and 1/4 cup of water. Anymore than that and your sushi rice turns into sushi dough. Place a lid on your pot and allow it to come to a boil on med-high heat. Once it starts to bubble turn down to min. heat. Allow to cook for around 15-20 minutes. You can add 1 teaspoon of sesame oil and 1 tablespoon of soy sauce to the water. It really adds to the flavour of your rice. Once all the water is absorbed and your rice is hot and sticky you can remove it from heat and give it a good stir. Now that thats cooling its time to do the fixings! This part is totally up to you! You can do whatever you want with it. Remember not to overstuff them too much or you'll have a hard time rolling them. Also remember to cut your vegetables long and thin so they fit better inside your roll when cutting pieces off. Fry up your tofu in your choice of stir fry sauce. Prepare a clean area to roll your sushi.


To roll your sushi without a mat you need to place a seaweed wrap on your cutting board. Place one big spoon full of rice onto your wrap. Flatten it out with a spoon. This makes it a lot easy to roll it. Make sure your rice is right to each side of the sushi wrap or they won't cut up into pieces very well. Place your ingredients in the middle and begin to roll from the side closest to you. Pinch tight with your fingers begin to roll the roll against the cutting board or plate. Its kind of like rolling burritos but without the sides folding in. Heres an example,


Just make sure you start by turning the end into the middle very tight and continue that motion till the entire thing is rolled. 
Use cold water to seal up the edges. Dip your fingers in cold water and rub the ends of the sushi wrap to form it together. 
Once thats ready you can slice up your sushi to serve!
This is my recipe for these rolls.

Recipe
2 cups sushi rice = 6 rolls
2 carrots, sliced thin and long
3 celery stalks, sliced thin and long
half a cucumber. sliced thin and long
half a red pepper, sliced thin and long
half a container of soyganic tofu, fried
Everland sweet n sour sauce
San J Soy sauce for dipping. 


I love dripping some sauce into the inside of the roll. It makes your rolls look extra fancy. 


 This is a picture of my yam tempura! I haven't posted the recipe yet but I thought I'd give you a sneak peek! Stay tuned if you want the recipe!


Saturday, 10 January 2015

VEGAN GARBANZO ( CHICKPEA ) FLOUR CHOCOLATE CHIP COOKIES

This recipe might seem a little bit weird at first but once yu take a bite you will regret not trying it sooner. Garbanzo bean flour is a great gluten free alternative for cookies. Its much healthier than eating regular ol' flour.  Its fun to experiment with different flours as well! Baking and cooking is all about trying new things and finding out what taste good together. The texture of these cookies are absolutely perfect though. By far one of the best I made. The chickpea flour makes them so soft and chewy. It makes for perfect cookies. I think it would work awesome for brownies too. Ill try that next. This recipe would be easy to make gluten free,  just substitute the whole wheat flour for any other gluten free flour. You could try and use just garbanzo bean flour but it is very soft and absorbs liquids easily leaving the consistency fairly sticky. I do advise using either gluten free whole wheat or unbleached white flour. I definitely will be posting more baked goods with garbanzo bean flour.  I love how veganism gets more interesting and fun!
Hope you love making my


Vegan garbanzo (chickpea) flour chocolate chip cookies


Recipe

Makes 350F
1 cup bob red mills Garbanzo(chickpea) bean flour
1 1/4 cup organic whole wheat flour
1 teaspoon cinnamon
1 teaspoon baking powder
1/2 teaspoon baking soda
1/2 teaspoon salt
2 tablespoons agave syrup
1/4 cup shredded coconut
1/2 cup enjoy life vegan chocolate mega chunks
1/4 cup earth balance butter, melted
1/2 cup turbinado sugar
1 banana, mashed
4 tablespoons spoons organic coconut milk


Steps


Preheat your oven to 350 F. Combine ingredients, flour to chocolate chips in a large mixing bowl. Stir together well with a fork,  making sure there is no clumps in your dry mix. In a medium sized bowl mix your melted earth balance and sugar. Mash 1 banana in a measuring cup and add 4 tablespoons of organic coconut milk. Mix together well and add it to your butter and sugar. Mix together well. Create a well in the middle of your dry mix and add your wet mix. Stir everything together with a large spoon for 5 minutes. If your mix is still too sticky you can add tablespoons of flour one at a time.  Once your cookie dough is ready you can rub earth balance on your cookie sheet for baking. Scoop out one large spoon of cookie dough and place it on the pan. 


They should be about an inch and a half across in size. Flatten out your cookies with a fork so its relatively flat. Repeat that until your cookie dough is finished.  I made 15! Bake for 10-12 minutes.  Let cool for 10 minutes before serving.  Enjoy your healthy dessert!


Thursday, 4 December 2014

VEGAN MAPLE PECAN SCONES W/ MAPLE ICING

Its December! I can't believe how fast November flew by. I barely had enough time to enjoy the fall and now its winter already! We had snow on Vancouver Island already. Of course since its extra chilly outside that calls for more baking inside! These are an awesome holiday recipe. They look great to serve at parties and they are perfect at any time of day. Super easy to make, cheap and quick! Plus it doesn't use a lot of ingredients up so you can make HUGE batches. You'll want to too because once someone eats one they are begging for more! Bake my maple pecan scones to warm you up on a chilly winter day!
Happy baking and happy holidays!

VEGAN MAPLE PECAN SCONES
with maple icing!

Scone Recipe

2 cups unbleached white flour
1 teaspoon baking powder
1/2 teaspoon salt 1/2 teaspoon ground ginger
1 teaspoon cinnamon
3/4 cup of toasted pecans, chopped fine
3/4 cup of bananas mashed = 2 ripe bananas
1/4 cup almond fresh coconut milk
2 tablespoons agave syrup 
1/2 teaspoon vanilla 
1 1/2 teaspoons maple syrup or flavour

Maple Icing Recipe

1 cup powdered sugar
1/8 teaspoon salt
1/2 teaspoons vanilla
1/4 cup agave syrup
2 teaspoons maple syrup or flavour
dash of almond fresh coconut milk


Steps

Preheat your oven to 425 F. Begin by putting 3/4 cup of pecans chopped fine on a baking sheet lined with parchment paper or aluminum foil. Toast them in the oven for 3 minutes. Be careful not to burn them!
Next combine all your dry ingredients in a large bowl. Mix together well with a fork. Add 1/2 cup of your toasted pecans to the mix and stir together. Saving the rest to sprinkle on top afterwards. Once all ingredients are combined, create a well in the middle. Add your butter to the dry mix first using either a pastry cutter or a fork to combine it well. Once all of that is mixed in, mash your bananas in a measuring cup then add your milk. It should equal one cup now. If it doesn't, add more milk till it does!  Create the well again and add your banana/milk mixture to the middle. Beat all the ingredients in together for another 10 minutes. Once that's ready prepare a lightly floured surface to roll your dough out on. 


Roll your dough out until its about 8 inches long by 4 inches tall. It should be around a 1/2 inch thick. 

Begin to cut your scones out in triangles using a knife. Prepare a lightly oiled baking tray to place them on and bake for 15 minutes.


Now that the scones are baking its time to making your icing! The icing really adds to the scones so don't skip this step! It's well worth it and easy as pie. 
Begin by putting your powdered sugar in a medium size bowl and add your salt. Mix it with a fork to make sure all the clumps are broken up. Next melt your butter and add the rest of the wet ingredients while you're mixing it. It's important to mix it while you're combining it because it really helps the consistency! 

It should be looking like this after 5 minutes though :)


Once that's ready pop it in the fridge till your scones are done. 

BAM FINTO
Easy right?


Let your scones cool down for 15-20 minutes once they are done. The longer the better because the icing sticks to the surface better when its cooler. Spread lots of icing over the top of your scones and sprinkle your remaining 1/4 cup of toasted pecans over top of your scones. Enjoy:)


Monday, 29 September 2014

BREAKFAST GRANOLA BARS

BREAKFAST GRANOLA BARS

So last night my boyfriend and I had a sweet tooth but weren't sure what to make. I had tons of nuts and peanut butter so i figured I'd make some granola bars. He had a weird request though, Cheerios! My boyfriend LOVES cheerios. So I figured I'd be able to make something good! This was definitely a "whatever you got in your pantry" kind of dessert but its great for taking to work and munching in the morning as well! Try experimenting by putting your favorite cereal in it or maybe some agave syrup instead of jam. Its basic, easy and good for you:)

Recipe
1/2 cup quick oats
1/2 cup graham flour
1/2 cup cheerios
1/4 cup almonds
1/4 cup raisins
1/4 cup cranberries
1/4 cup sunflower seeds
2 tablespoons brown sugar
2 tablespoons jam
1 tablespoon almond fresh coconut milk
2 tablespoons earth balance butter, melted
1 cup peanut butter, smooth

Steps
Preheat your oven to 325 F
Combine all ingredients (quick oats-sugar) in a large bowl. Stir together well. Once mixed, add your jam, almond milk, earth balance and peanut butter. Your mixture should begin to form into a big ball. If its too dry you can add more milk or agave syrup. The more sticky stuff you put in it the better they will stay together! Stir it together very well, pushing it down while you're doing this to help make the mixture stick together well.
Rub some earth balance on a baking dish so your granola bars don't stick. Pour your entire mixture into your dish and begin to press it down with a spatula. Continue to press your granola bars for 10 minutes.
 Make sure theres lots in all the corners and edges. The longer you press them the better your granola bars will stick together so keep going as long as you can! Once your granola bars are packed enough sprinkle something on top to finish it. I used coconut shreds. 
Give them one more push to make sure all the coconut will stay on your bars and put it in the oven. Bake for 25 minutes. Let stand for 10-15 minutes before you eat. If its still steaming let it sit longer. If you cut it to soon your bars will fall apart! If you want them  to stay together really well don't cut them that night. Leave them in the dish and refrigerate overnight. Theres no way they will fall apart after that. Enjoy:)


Wednesday, 17 September 2014

SWEET POTATO BLACK BEAN BURRITOS

SWEET POTATO & BLACK BEAN BURRITOS
W/ YVES GROUND CHICKEN


It was Mexican food night at our house! We went all out. These were amazing. The picture slightly does justice. I decided to add yves ground chicken for fun because I had half a pack from our pizzas the night before. The recipe is just as good with just beans and veggies. :) I even bought taco seasoning this time. I usually just make my own. Anyways happy vegan mofo!
Enjoy!

RECIPE
For rice
1 cup rice
2 cups water
2 tablespoons taco seasoning
2 tablespoons earth balance buttery spread

Sweet Potato
1 whole sweet potato, cubed
1 pot w/water to boil potatoes
Olive oil
Taco seasoning
Pinch of salt


Bean mixture
1 can black beans
1 can corn
4 tablespoons taco seasoning
1 teaspoon of fresh thyme

Vegetable mixture
1/2 purple onion, diced
2 cloves garlic, minced
1 crimini mushroom, diced
1/2 yellow pepper, diced


Combine 1 cup of rice in 2 cups of water with 2 tablespoons of taco seasoning. Place lid on top. Bring to a low boil on medium-high heat then reduce to low-med and cook for 15 minutes or until all water is absorbed. Stirring occasionally. Add 2 tablespoons of earth balance buttery spread to add flavour and help keeping your rice from sticking once its done!

Now thats going its time to get your potatoes ready. Preheat your oven to 350 and get a baking pan. Oil the pan with olive oil. This is for baking your sweet potatoes. Prepare a small pot with some boiling water for your potatoes. Cube your sweet potato. Once the water is boiling add your potatoes and boil for 4 minutes. Drain your potatoes and place them onto your pan. Brush them with some more olive oil so the top get crispy and sprinkle some taco seasoning and salt on top. Pop those in the oven. Stirring occasionally. Bake for 10 - 15 minutes or until your sweet potatoes are crispy. 
Cut all your desired vegetables for your burritos. Get a frying pan on medium heat with some canola oil ready to fry your beans and corn. Once the pan is hot add your beans and corn and spices. Let them fry while your vegetables and potatoes cook to add flavour and make them nice and soft. Get another larger frying pan prepared with canola oil on medium heat. Add your garlic, onion, peppers and mushrooms and saute for 5 minutes. Add your ground chicken and spices. Fry for another 5 minutes. Stirring occasionally.

Next cut up any toppings vegges. My boyfriend and I did kale, stuffed olives, cherry tomatoes and alfalfa sprouts. 


By this point your rice and potatoes should be pretty much done as well as your veggies. Heat your tortillas and BAM. Dinner is served! Happy vegan living everybody:)


Saturday, 13 September 2014

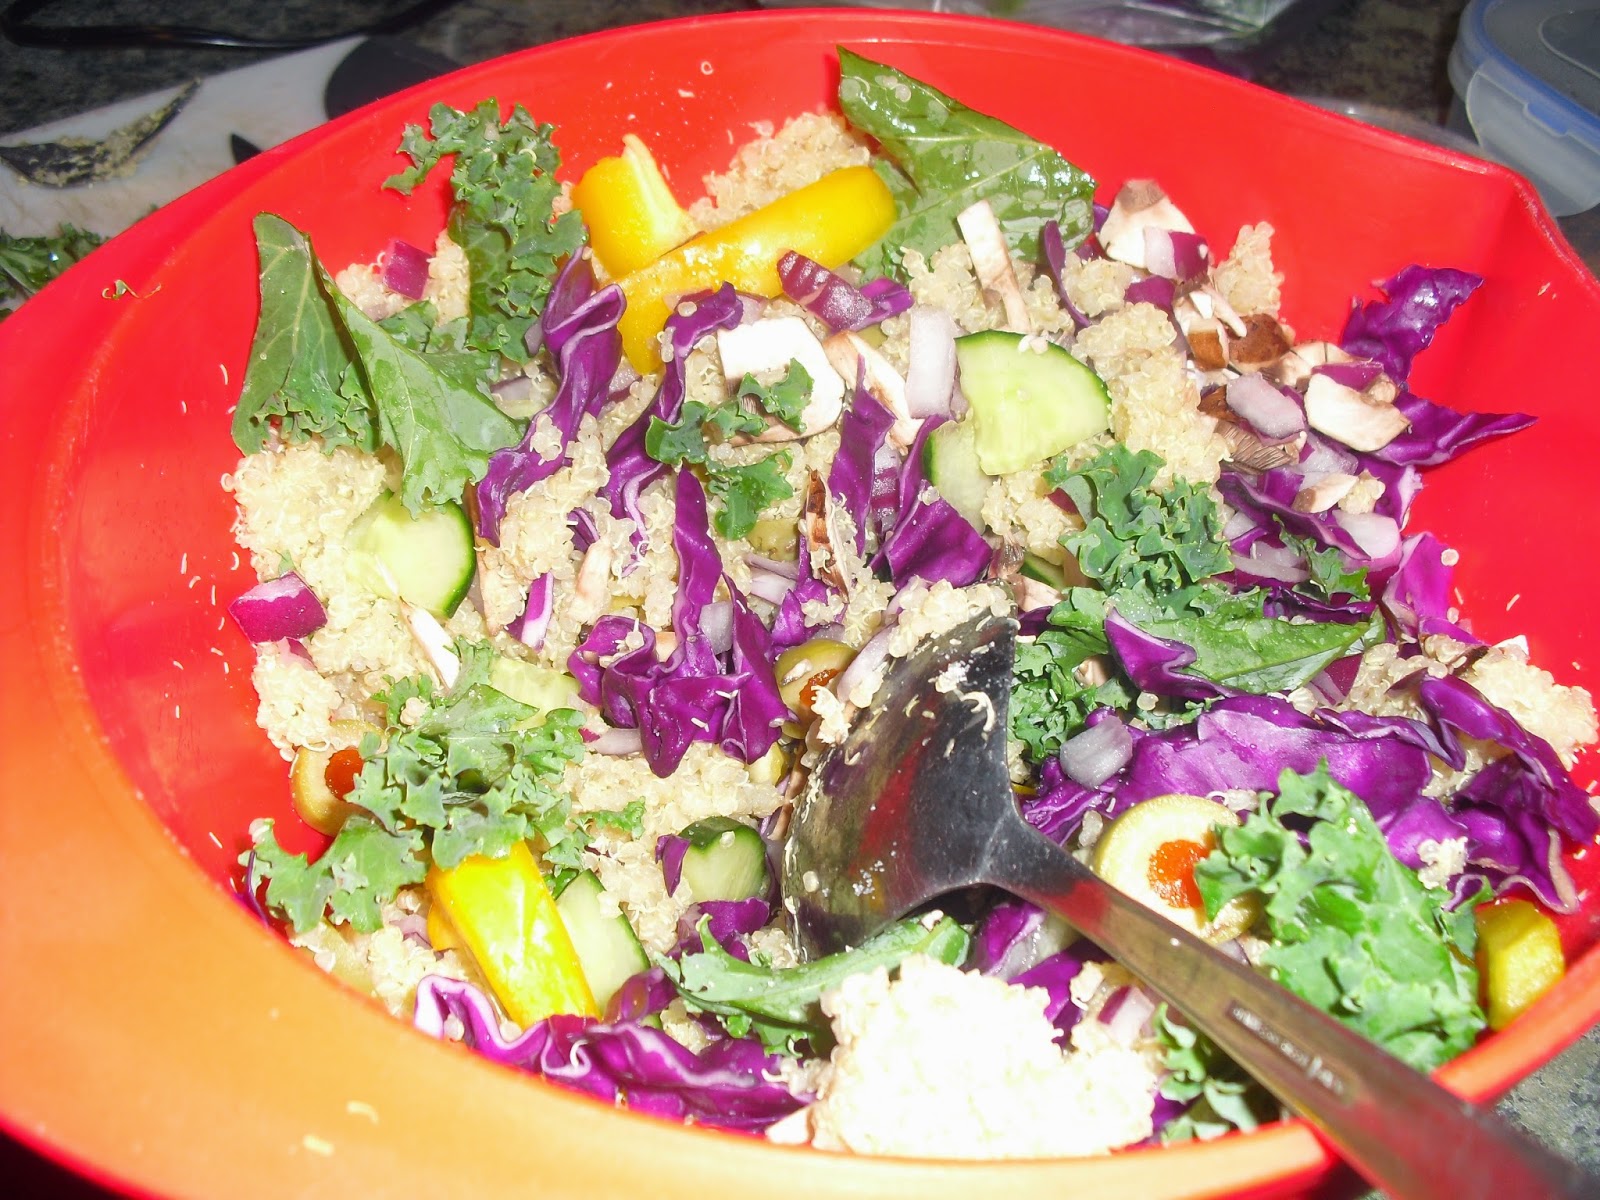
QUINOA SALAD RECIPE

QUINOA SALAD


This is every healthy eaters favourite easy meal. Its versatile, simple, fun and yummy! Quinoa is an essential thing for a healthy lifestyle. Quinoa combined with nuts make a whole protein, just like rice. Its lighter and fluffier than rice though, making it easy to eat tons and use it for breakfast and light lunches. Quinoa can be sweet or salty. It doesn't have much of its own taste so have fun making it your own and use different toppings! I love cranberries and sunflower seeds in my salads. Theres a million different ways to do it though. Make it just like you would make a green salad but add two cups of quinoa to help boost the protein! Enjoy fooling around with this simple Quinoa Salad recipe :)...


RECIPE

Quinoa:
1 1/2 cups quinoa
pinch of salt
3 cups water

Vegetables:
Half a yellow pepper, diced
4 leaves of purple cabbage, sliced
1 handful of kale
1/4 purple onion, diced
handful of minced shallot
6 olives, sliced
8 cherry tomatoes, sliced
1 mushroom, diced
10 slices of cucumber


STEPS

Add 3 cups of water to a pot and a pinch of salt. Cover and bring to a boil. Once it's boiling add your 1 1/2 cups of quinoa. I use Bob Red Mills Organic Quinoa. (It tastes really good if you like plain quinoa like me!) Cover your quinoa and let it cook for 12 minutes. While thats cooking you can cut up all your veggies. Any taste great with quinoa. Get creative and color and add different things. I like using purple cabbage and kale. They have deep rich colors. It looks great if you're looking to impress.:)
I grew the cabbage and tomatoes from my backyard!

Once all your veggies are done your quinoa should be almost finish. You can stir it every once in a while just to make sure nothing is sticking. By 12 minutes most of the water should be absorbed. Lightly fluff your quinoa with a fork to ensure all the water is absorbed and to help add texture and body.


Add your vegetables and stir them in well. Add spices on top for flavour. I would recommend pepper, curry and nutritional yeast.


 Now is the fun part because you can get creative here. Hemp hearts are great for you and go awesome in salads. I pretty much put them on everything because they have such a light, nutty taste. These are my favourite :) 


I crumbled up some of the falafel that we had left over from the night before and put it on top. The perfect touch:) 


Finto.